Why Most At-Home Workout Advice Fails You (and What to Do Instead)
The internet is full of lists - 30 moves, 20-minute circuits, 10 exercises you must do. But if you have tried following those, you have probably hit the same wall I did when I started training from my living room: most of them assume you have a baseline level of strength, flexibility, and spatial awareness that you might not have yet.
The core question is not "what exercises can I do at home?" It is "how do I do exercises safely and effectively in the space I have, with the body I have, today?" The answer is not a longer list of moves. It is a shorter list of moves that you can scale up and down depending on how you feel, what equipment you have, and how much room you are working with.
This guide covers five core movements. Each one includes a regression (easier version), a standard version, and a progression (harder version). You also get a small-space modification for each using only a chair and a wall. This is the framework I use with clients who train in studio apartments, hotel rooms, and cramped home offices.
The best home workout is not the one with the most exercises. It is the one you can do safely, consistently, and with proper form in the space you actually have.
The Problem with Generic Exercise Lists
Most ranking articles give you a list of moves with a one-line description like "do 3 sets of 10 squats." That sounds simple, but it skips the most important part: how to make the exercise fit you. A squat looks different for someone with tight hips, a bad knee, or a weak core. A push-up is not the same for a 20-year-old athlete and a 55-year-old beginner.
When I first started working out at home, I made the mistake of doing standard push-ups because every list said to do them. I had shoulder pain within two weeks. The problem was not the exercise - it was that I was not ready for the standard version. I needed to build scapular control first. Nobody told me that. This is exactly the kind of thing that makes people quit.
The other issue is space. I once lived in a place where I had about 4 feet by 6 feet of open floor. Most workout videos assume you have room to lunge across the room or roll around on a mat. You do not need that. You need a system that works within the constraints you have.
The Adaptable Home Workout Framework
I call this the "Big Five" approach. You will learn five movements that cover your entire body:
- Squat - for your legs and glutes
- Push-up - for your chest, shoulders, and triceps
- Row - for your back and biceps (the missing piece in most home workouts)
- Deadlift - for your posterior chain (hamstrings, glutes, lower back)
- Plank - for your core and stability
Each movement has three levels. Start at the level where you can do 8 repetitions with perfect form, and work up to 15. Then move to the next level. This is called progressive overload - the principle that muscles adapt only when you gradually increase the demand placed on them.
The beauty of this system is that you do not need to think about what comes next. You have a clear path from beginner to advanced within each movement. And because there are only five exercises, you can remember them without a screen or a printed list.
How to Use the 3x3 Progression Model
For each exercise, you will see three levels. Here is how to structure your workout:
- Pick one level for each of the five movements. You can mix levels - for example, a standard squat, a push-up regression, and a plank progression.
- Do 3 sets of 8-15 repetitions per movement (for the plank, hold for 20-45 seconds per set).
- Rest 60-90 seconds between sets. If you are short on time, rest 45 seconds.
- Do this routine 3 times per week, with at least one rest day between sessions.
This takes about 25-35 minutes. When you can hit the top of the rep range (15 reps or 45-second hold) with perfect form for all sets, move up to the next level.
The "Two Sets" Rule for Progression
Here is a practical detail most articles miss: you should not progress all your sets at once. If you can do 15 reps on your first set but only 10 on your third, you are not ready to progress. Use the "two sets" rule - progress only when you can hit the target rep range for at least two out of three sets. On the third set, do as many as you can with good form, even if it is fewer.
This prevents the most common mistake I see: people jump to a harder version, do it badly for a few reps, and then wonder why they are sore in their joints instead of their muscles. The joints hurt because the form broke down. The muscles never got worked because the load was too heavy to control.
The 5 Core Exercises with Regressions and Progressions
Now let us get into the actual movements. For each one, I will give you the standard version, how to make it easier, how to make it harder, a small-space modification, the most common mistake, and the form cue that fixes it.
1. Squat
The squat is the king of lower-body exercises. It works your quads, hamstrings, glutes, and core. It also translates to real-life movements like sitting down and standing up from a chair - which is why the regression uses a chair.
Standard Squat
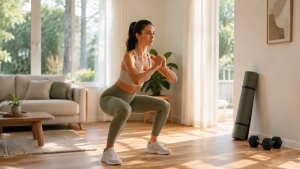
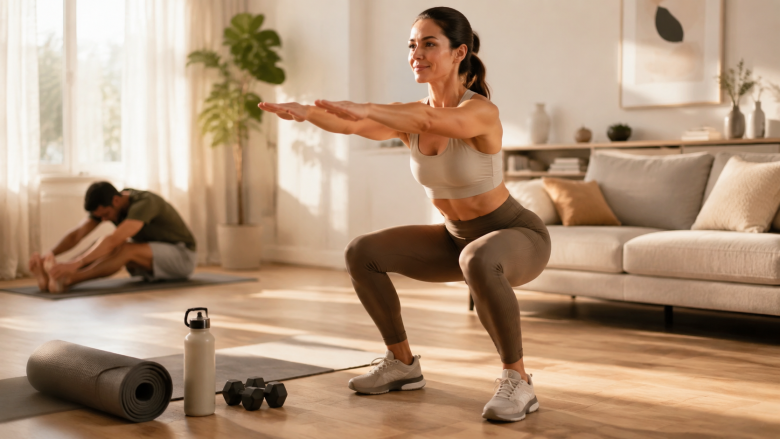
Stand with your feet shoulder-width apart, toes pointed slightly outward. Keep your chest up, brace your core, and push your hips back as if you are sitting in a chair. Lower until your thighs are at least parallel to the floor, or as low as you can go without your lower back rounding. Push through your whole foot to stand back up.
Form cue: Spread the floor apart with your feet. This external rotation cue engages your glutes and keeps your knees tracking over your toes instead of caving inward.
Common mistake: Knees caving inward on the way up. This is often a sign of weak glutes, not a knee problem. Fix it by placing a resistance band just above your knees and pushing out against it during the movement.
Regression: Chair Squat
Place a sturdy chair behind you. Sit back until your glutes lightly touch the seat, then stand back up. Do not collapse onto the chair - just touch and rise. This reduces the depth you need to achieve and gives you a safety net if your knees are cranky.
Small-space tip: If you do not have room to step back to a chair, face a wall. Stand about 6 inches away from it. Squat down with your nose lightly brushing the wall. This forces your knees to track properly and prevents you from leaning too far forward.
Progression: Single-Leg Squat (Assisted)
Stand next to a chair or a wall. Hold on with one hand for balance. Lift one foot slightly off the floor and squat down on the standing leg as deep as you can, then push back up. Do all your reps on one side, then switch. This is a significant jump in difficulty - it requires balance, ankle mobility, and single-leg strength.
If this is too hard at first, use two hands on the chair and just lower yourself a few inches. The goal is to gradually reduce the help from your arms over several weeks.
2. Push-Up
The push-up is the best upper-body pushing exercise you can do without equipment. It works your chest, shoulders, triceps, and core. The problem is that the standard version is too hard for many beginners and too easy for advanced trainees who have mastered it.
Standard Push-Up
Start in a high plank with your hands slightly wider than shoulder-width, fingers pointing forward. Your body should form a straight line from your head to your heels. Lower your chest to the floor, keeping your elbows at about a 45-degree angle to your body. Push back up to the start.
Form cue: Squeeze your glutes and brace your abs before you lower. This creates full-body tension that protects your lower back and makes the push-up stronger.
Common mistake: Flaring your elbows out to 90 degrees. This puts your shoulders in a vulnerable position and reduces chest activation. Keep your elbows closer to your body - imagine you are trying to squeeze a grape in your armpit.
Regression: Wall Push-Up or Incline Push-Up
The wall push-up is the most forgiving version. Stand facing a wall, place your hands on it at chest height, and walk your feet back a few steps. Lean forward and bend your elbows to bring your chest toward the wall, then push back. The more vertical your body, the easier the exercise.
As you get stronger, lower the angle by using a countertop, then a sturdy table, then a low couch or stairs. Each step down increases the difficulty.
Small-space tip: The wall push-up is already the ultimate small-space exercise. You need about one square foot of wall. It is perfect for hotel rooms.
Progression: Feet-Elevated Push-Up or Slow Tempo Push-Up
Place your feet on a chair, couch, or bed so your body is at an incline. This shifts more of your body weight onto your hands, making the push-up harder. Keep your body rigid - do not let your hips sag.
Alternatively, lower yourself for a 3-second count, pause at the bottom for 1 second, and push up explosively. The slow tempo increases time under tension, which builds strength without needing extra load.
3. Row (Using a Towel or Bag)
Most home workouts skip pulling movements, which leads to muscle imbalances. You push with push-ups and pull with rows. If you only push, you develop rounded shoulders and a weak upper back. The row fixes this, and you do not need a barbell to do it.
Standard Row: Towel Row
Loop a towel around a sturdy doorknob, a table leg, or a banister. Sit on the floor with your legs extended, holding one end of the towel in each hand. Keep your arms straight, lean back slightly, and pull your hands toward your ribs, squeezing your shoulder blades together. Your body should remain in a straight line - do not let your hips lift.
If you have a bag or backpack, fill it with books or water bottles. Hold the bag by its handles, hinge forward at your hips with a flat back, and pull the bag toward your lower ribs. This adds external resistance without any special equipment.
Form cue: Think about pulling your elbow toward your back pocket, not just moving your hands. This recruits your lats and mid-back muscles instead of just your arms.
Common mistake: Shrugging your shoulders up toward your ears. Your shoulders should stay down and away from your ears throughout the movement. Imagine you have a pencil tucked under each armpit.
Regression: Wall Row
Stand facing a wall with your feet about 12 inches away. Place your hands on the wall at shoulder height. Keep your body straight and let yourself fall forward, then push back to start. This is essentially a wall push-up, but the row version is done with an underhand grip (palms facing up) to target the biceps and back.
Honestly, the wall row is more of a deload than a true row, but it teaches the scapular retraction pattern you need for the real thing. If you have a resistance band, you can do a better regression: step on the band with both feet, hold the handles or the band itself with arms extended, and pull the band up toward your ribs, keeping your elbows close to your body.
Progression: Single-Arm Towel Row or Bag Row with More Weight
Once the standard row feels too easy, do it one arm at a time. Hold the towel or bag with one hand, keep your other arm behind your back, and perform the same pulling motion. This forces your core to work harder to prevent rotation.
You can also simply add more weight to your bag. A bag full of books can easily give you 10-20 pounds of resistance, which is plenty for home training.
Small-space tip: The towel row around a table leg requires about 3 feet of floor space. If you are in a hotel room, you can do the same movement by looping the towel around the base of a heavy desk or even a closed door (only if the door is sturdy and you are not pulling it off its hinges - check first).
4. Deadlift (Using a Bag or Backpack)
The deadlift is the ultimate posterior chain exercise. It strengthens your hamstrings, glutes, and lower back. At home, you can mimic the pattern with a loaded backpack or a heavy bag of groceries.
Standard Deadlift: Bag Deadlift
Place a loaded backpack or bag on the floor in front of you. Stand with your feet hip-width apart, toes pointing forward. Hinge at your hips, push your butt back, and keep your back flat as you reach down to grip the bag handles. Keep the bag close to your body as you stand up by pushing your hips forward and squeezing your glutes at the top.
The key is the hip hinge - your hips go back, your chest stays proud, and your back stays neutral. This is not a squat. Your knees should bend only slightly.
Form cue: Imagine you are closing a car door with your butt. That is the hip hinge motion.
Common mistake: Rounding your lower back to reach the bag. If you cannot reach the bag with a flat back, bend your knees more or place the bag on a low stool or a stack of books. Do not sacrifice your spine.
Regression: Hip Hinge with No Weight
Stand with your back against a wall, feet about 6 inches away. Place a rolled-up towel or a small cushion between your lower back and the wall. Keeping your back in contact with the cushion, push your hips back and slide down the wall until you feel a stretch in your hamstrings, then stand back up. This drills the hinge pattern without any load.
Once the pattern feels natural, hold a light bag or just a water bottle in front of you and repeat the motion.
Progression: Single-Leg Deadlift
Stand on one leg, holding the bag in the opposite hand. Hinge forward at the hips, keeping your back flat and your standing leg slightly bent. Extend your free leg behind you for balance. Lower the bag toward the floor, then return to standing by squeezing your glutes.
This is a fantastic exercise for balance, hamstring strength, and core stability. It also reveals any imbalances between your left and right sides.
Small-space tip: The wall hip hinge is perfect for small spaces because you only need a wall and about 2 feet of floor. For the single-leg version, you can hold onto a chair with one hand for balance, which allows you to focus on the hip hinge without worrying about falling over.
5. Plank
The plank is the gold standard for core stability. But it is often done poorly - with sagging hips, elevated butts, or craned necks. A good plank is about full-body tension, not just holding a position.
Standard Plank
Start on your forearms and toes. Your elbows should be directly under your shoulders. Your body should form a straight line from your head to your heels. Squeeze your glutes, brace your abs, and tuck your chin slightly. Hold for 20-45 seconds per set.
Form cue: Push the floor away from you with your forearms. This engages your lats and prevents your shoulders from hunching up toward your ears.
Common mistake: Letting your hips sag. This usually happens when your core and glutes are not engaged. The fix is not to hold the position longer - it is to engage your glutes harder. Squeeze them like you are holding a coin between your butt cheeks.
Regression: Wall Plank or Knee Plank
The wall plank is the easiest version. Place your forearms on a wall at shoulder height, step your feet back, and lean forward. Keep your body straight and hold. This teaches the tension pattern without loading your core as heavily.
The knee plank is the next step. Get on your hands and knees, place your forearms on the floor, and extend your legs behind you, resting on your knees rather than your toes. Keep your hips tucked under - do not let them pike up.
Progression: Plank with Shoulder Taps or Leg Lifts
Once you can hold a standard plank for 45 seconds with perfect form, add movement. From a high plank (on your hands), tap your left shoulder with your right hand, then alternate. Keep your hips as still as possible - this is a test of anti-rotation strength.
From a forearm plank, lift one foot a few inches off the floor, hold for 2 seconds, and lower. Alternate legs. This shifts your center of gravity and forces your core to work much harder.
Small-space tip: The wall plank is ideal for tiny spaces. You can also do the standard plank diagonally across a hallway if you need more length - just make sure your mat does not slip.
Putting It All Together: The 25-Minute Routine
Here is a sample routine that combines all five movements. It is designed to take about 25 minutes, including short rests.
- Squat: 3 sets of 8-15 reps (choose your level). Rest 60 seconds.
- Push-up: 3 sets of 8-15 reps (choose your level). Rest 60 seconds.
- Row: 3 sets of 8-15 reps per side (if single-arm). Rest 60 seconds.
- Deadlift: 3 sets of 8-15 reps (choose your level). Rest 60 seconds.
- Plank: 3 sets of 20-45 second holds. Rest 45 seconds.
Do this routine 3 times per week on non-consecutive days. On your rest days, you can do light walking, stretching, or breathing exercises to aid recovery.
It is that simple. No equipment beyond a chair, a wall, and something with a handle (a towel, a bag, or a backpack). If you want to make it harder, progress any of the five movements to the next level. If you are having an off day, regress.
Warm-Up and Cool-Down: The Non-Negotiables
You might be tempted to skip the warm-up, especially if you are short on time. Do not. A good warm-up takes 3-4 minutes and reduces your risk of injury significantly. It does not need to be complicated.
The 4-Minute Warm-Up
- March in place for 60 seconds, swinging your arms to get your blood flowing.
- Arm circles - 30 seconds forward, 30 seconds backward. Start small and gradually make bigger circles.
- Bodyweight squat to chair - do 10 slow reps, focusing on your hip hinge, to activate your glutes and warm up your knees.
- Cat-cow stretch on all fours for 60 seconds to mobilize your spine before the plank and row.
This is not a workout - it is preparation. Your muscles are like cold taffy. They need a little warmth before you ask them to work hard.
The 5-Minute Cool-Down
After your workout, take 5 minutes to cool down. This is when your body starts the recovery process. Hold each stretch for 30 seconds without bouncing.
- Quad stretch - stand, hold your foot behind you, and pull it toward your glute.
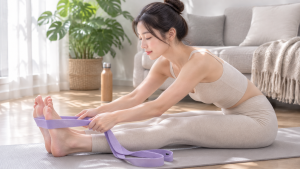
- Hamstring stretch - sit on the floor, extend one leg, and reach for your toes.
- Chest stretch - place your forearm on a wall at shoulder height and turn your body away from the wall.
- Child's pose - kneel, sit back on your heels, and reach your arms forward on the floor.
For a more detailed routine, check out our guide on building a simple morning stretching routine - the same principles apply to your post-workout cool-down.
Adapting to Small Spaces and Limited Equipment
I have worked out in a 4x6-foot corner of a studio apartment and in a hotel room that barely had room for a suitcase. The system above works in both. Here are specific strategies for the tightest spaces.
Use the Wall for Everything
The wall is your best friend. It is a squat correction tool, a balance aid, a push-up surface, and a row anchor. The wall push-up, wall row, and wall hip hinge require almost zero floor space.
One thing nobody tells you about wall exercises: they are great for teaching body awareness. When you push against a wall, you get instant tactile feedback on your alignment. If your hips are too far from the wall, you feel it. If your shoulders are uneven, you feel it. This is why I start complete beginners with wall versions even if they have enough floor space for the standard moves.
The Chair as a Multi-Tool
A sturdy chair is worth its weight in gold. It is a squat target, a push-up elevation, a single-leg squat support, and a deadlift platform. Make sure the chair is stable - if it wobbles, do not use it. Test it with your weight before you lean on it.
I once used a flimsy dining chair for single-leg squats and nearly tipped over. The chair buckled, and I caught myself on the wall. Learn from my mistake: use a solid wooden or metal chair with four legs, not a folding chair or one with wheels.
When to Skip a Move
There is no shame in skipping a movement if you do not have the space or the energy. If your shoulder hurts, do not do push-ups. If your knee is cranky, do the chair squat instead of the single-leg version. The framework gives you options, not obligations.
Listen to your body. Sharp pain is a red flag. Dull muscle soreness is normal. If something feels wrong, stop. You can always do the wall version or a different movement.
Common Mistakes and How to Fix Them
Over years of training at home)Skip to content. I have seen the same mistakes repeated. Here are the most common ones and the simple fixes.
Mistake 1: Sacrificing Form for Reps
When you are tired, it is tempting to crank out a few more reps with sloppy form. Do not. Five perfect reps are worth more than fifteen sloppy ones. Sloppy reps train your body to move badly, which carries over to real life and increases your injury risk.
Fix: Stop your set when your form breaks, even if you have not hit your target rep count. Rest, and try again. If your form breaks on the second set, that is a sign you need to regress to an easier level.
Mistake 2: Moving Too Fast
Most people rush through reps, using momentum instead of muscle. This is especially common with squats and push-ups. The faster you move, the less time your muscles spend under tension, and the less strength you build.
Fix: Use a 2-second lowering phase and a 1-second lifting phase. Count in your head: "down, down, up." This simple change makes every exercise significantly harder and more effective.
Mistake 3: Ignoring the Eccentric Phase
The eccentric phase is the lowering part of the movement - the descent of a squat, the lowering of a push-up, the return of a row. This is where your muscles are lengthening under load, and it is where most of the strength gains come from.
Fix: Focus on controlling the lowering phase. Slow it down. This is also where most injuries happen because people lose control and let gravity take over.
Mistake 4: Not Breathing
People hold their breath during exercises, which spikes blood pressure and makes you dizzy. You need to breathe to fuel your muscles.
Fix: Exhale on the effort (the push or the lift), inhale on the release (the lowering). For the plank, breathe steadily throughout the hold - do not hold your breath.
When to Progress and When to Stay Put
Progression is not linear. Some weeks you will feel strong, and other weeks you will feel like you are starting over. This is normal. It is called non-linear progression, and it is how your body actually responds to training.
Do not force a progression on a day when your energy is low. If you tried the single-leg squat last week and it felt fine, but today it feels shaky, go back to the standard squat. That is not a failure - it is intelligent training. Your body is telling you it needs more recovery or that you are fighting off a cold.
Here is a simple decision rule I use with my clients:
- If you can hit 15 reps with perfect form on your first two sets, progress next time.
- If you can only hit 8-10 reps, stay at the same level.
- If you are struggling to hit 8 reps, regress to the easier level.
This takes the guesswork out of training and lets your body dictate the pace.
The Mental Game: Why Consistency Beats Intensity
The most important muscle you train at home is between your ears. The best routine in the world is useless if you do not do it.
I have had weeks where I only managed one workout instead of three. I have gone months without training due to illness or travel. The key is not perfection - it is coming back. A 15-minute session is infinitely better than no session.
One strategy that works: set a minimum effective dose. Tell yourself, "I will do one set of each exercise - just one." Most of the time, once you start, you will finish the full routine. But even if you stop after one set, you have done something. You have maintained the habit.
This is why I designed the routine to be flexible. On a bad day, do one set of each. On a good day, do three. The framework adapts to you, not the other way around.
And if you want to make your home workout space more inviting, see our guide on setting up a cozy corner for home workouts - a dedicated space, even a tiny one, helps your brain switch into exercise mode.
Final Thoughts: Start Where You Are
The hardest part of any home workout is not the exercises. It is starting. You do not need to be fit, flexible, or coordinated. You need to start where you are and trust the process.
Pick one level for each of the five movements. Do the routine once. See how your body responds. The next day, you will be a little sore - that is normal. The day after that, you will feel a little stronger. That is the feeling of progress.
In two weeks, you will be ready to progress one of the movements. In a month, you will have a completely different body awareness. In three months, you will wonder why you ever thought you needed a gym.
The framework is simple: five movements, three levels each, one chair, one wall, and twenty-five minutes. That is all you need. Now go move your body.